Friday, October 29, 2010

Welcome PFG

Hey there Precision Funding Group LLC!  Thank you for stopping by my blog :)

www.PFGMortgagecenter.com


Hope you enjoy the scrumptious cupcakes today!  Cupcake Cheers to all of you!  

Have a Happy Halloween!  

Please follow along!   

Peace, Love & Cupcakes~

Stacy

Thursday, October 28, 2010

Cute S'more Treats - Perfect for Pre-Schoolers

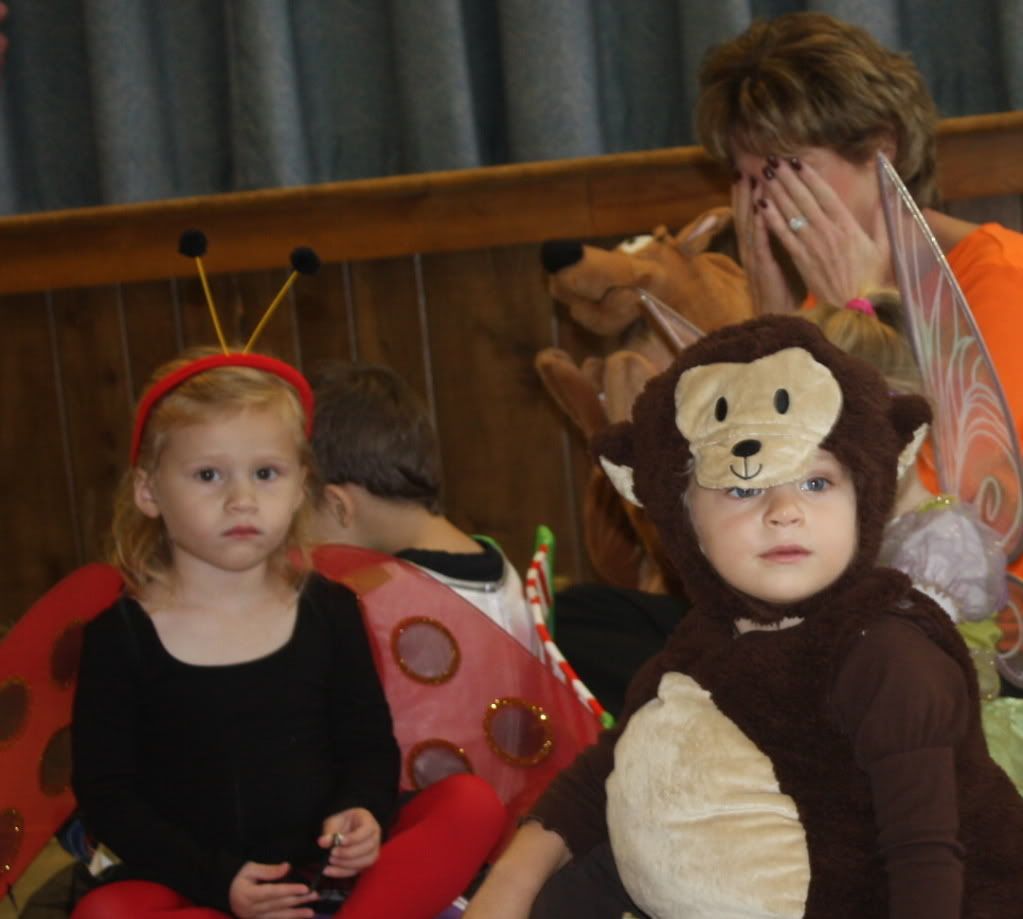
Here is a quick in expensive cute pre-school age treat you can put together quickly.   The presentation of it looks as cute as my little ladybug did today! Well you will see below, she was cute but by her looks she wasn't happy! 

Back to the cute s'more treats she handed out today! These are perfect for the classroom or cute little neighbors you will have as trick and treaters Sunday.  
How Cute are These??  
Photobucket


Here's what you need~
Photobucket

I got all of things at our Super Walmart

Snack Packs of Teddy Grahams- box of 12 for $3.00
Bag of snack size Hershey Bars - $2.50
Snack Pack of Kraft Boo Mallows  - $2.50
Clear Treat Bags by Wilton - $2.00
White Treat Boxes in the party section of Walmart - 8 for $1.50
Ribbon - $1.97
Printed Labels- I personalized my own, if you don't know how to create your own click onto this link to the Tip Junkie for free printables.  


Moving right along, take the snacks out and put them in the treat bags. I stacked mine as if it were a real s'more with 2 pieces of the Herseys Chocolate.  Cut your pieces of ribbon and tie the top of the bags and place them into boxes!  Cut out your labels and attach it with double sided tape! 

Photobucket
These are a couple of reasons why I think they are so "pre-school" friendly.....all the snacks were packaged so if a parent or teacher didn't want them to eat it they could manage to get it home.  Two because to me there seems to be peanut allergies in almost every class these days.  That little treat combo was all peanut free!!  

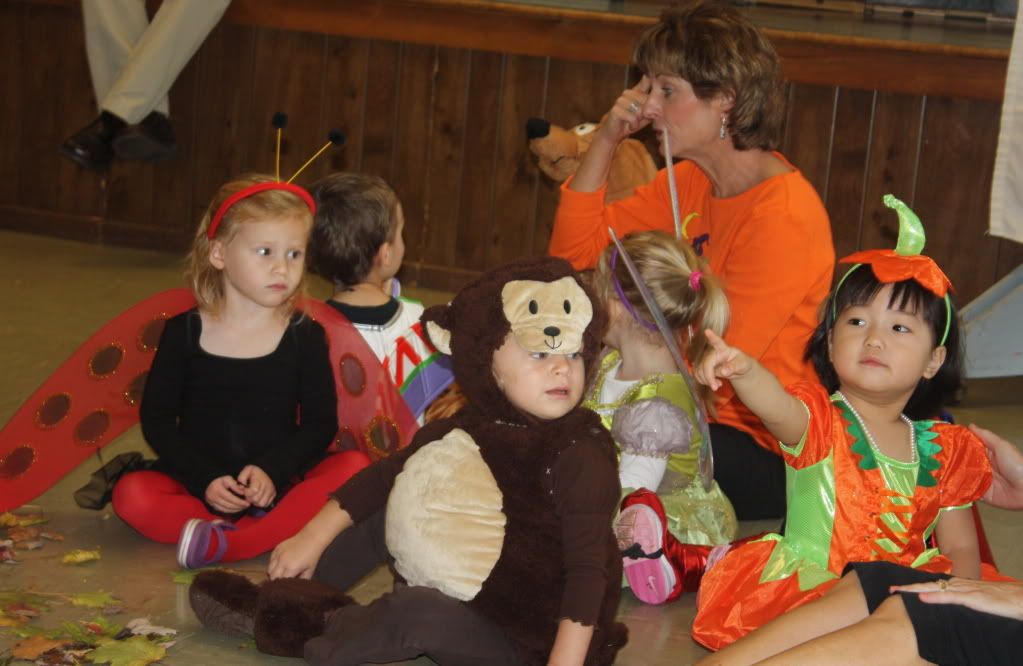
Here of the pictures of my daughter's class today for their Halloween Parade to the "Pumpkin Patch" which was full of decorated pumpkins and jack o lanterns created by the classrooms.  

(In the photos please note my energetic, lively, humorous lady love bug was what I found out terrified of the carved pumpkins and ended up getting overly upset)  All I can say is thank goodness I found out this today!!!  Poor little girl looking at the photos broke heart!  But after you will see when she got back to her classroom and away from the jack o lanterns....life got a little better for her!

Photobucket
Photobucket
Little sister Margaret waiting to video the parade with the Flip
Photobucket
Photobucket
They were singing songs & the were told a story, but she knew the pumpkins were right next to her
Photobucket
I'm not sure what her look to me was either "Are you kidding me with this Mom" or "Could you please get me out of here!"
Photobucket
{Insert my Tears & Crushed Heart Here}
I would have never guessed carved pumpkins would bring her to this!  Good thing for the Martha Stewart Halloween Central on her web with plenty of non scary pumpkin ideas, for when we do ours tomorrow!  
We quickly went to the ladies room and when we were done the class was going back to their room! Emma was able to hand out her treats to her friends were she was happily content for the rest of the afternoon~ with No Pumpkins in the room!
                                      Photobucket

Peace, Love & Pre-school Treats,
Stacy

Tuesday, October 26, 2010

Ghosts in the Graveyard Sweets Table

My Halloween Sweets Table that everyone can enjoy!  The theme I used is "ghosts in the graveyard", ...remember the game?  I always used to play growing up.  The table has sweets that everyone can enjoy even if you don't like candy!  Or more specifically if you want all kinds of sweets after all it is Halloween...candy bars, cupcakes, licorice, cookies, peanutbutter Mary Jane candy to graveyard dirt!

More things to come this week for Tricks for your Treats but for now I hope you can get inspired with some of the elements of the table.   Make sure you plan to play "Ghosts in the Graveyard...Run, Run, Run!" with your ghouls and goblins this weekend!


Photobucket
Photobucket
Photobucket
Photobucket
Photobucket
Photobucket
Photobucket
Photobucket
Photobucket
Photobucket
Photobucket
Photobucket
Photobucket

All the Halloween figures I had from over the years, I always pick up things here and there for around the house during the fall season.
Headstone Printables ~ Elle's Studio Blog
Candy Jar & Food Labels ~ Gwynn Wasson Designs Blog
Candy Jars from Walmart & Spider Web Ribbon from Martha Stewart
Gerber Daisies are "Sunrise" color

Peace, Love & Ghosts in the Graveyard,

Stacy

Monday, October 25, 2010

{Recipe} TRICKS for your TREATS!

Photobucket


I'm calling this "Graveyard Dirt" because honestly... I don't know what it is called exactly.  To me it is a "grown-up" version of the dessert dirt (crushed oreo's and whipped cream).  

This dessert is absolutely so easy and so scrumptious, it is a must try!  

Here is what you need~
Photobucket

Whipped Cream
Dark Chocolate Mousse
Heath Toffee Bits
And the best part.........
BROWNIES!!! 
Either make a batch or honestly,  to make it even easier so the only thing you are really preparing is the chocolate mousse,  I buy mine from the bakery in the grocery store.  I won't but much from the bakery but brownies I will especially when you are mixing it in with other sweets.  Either way, to me it is what makes this whole dessert!

After you prepare the brownies and the mousse, this is what to do~
You can prepare it 2 ways, either make a big bowl so that you spoon servings out or use the tasting serving bowls like in the pictures here.  You want to crumble your cooled brownies into bite size pieces or smaller.  

Basically you just layer the mousse, then the brownies, toffee bits then whipped cream!  So easy, if you use a big bowl I do 2 layers of each ending with the whipped cream.  With the serving dishes just do one and garnish with a few toffee pieces & crumbled brownie!  There you have it! The tasting dishes I have came with little spoons from Pier 1 Tasting Collection that is what I attached the headstones too~ Super cute, very scrumptious and absolutely for the young & old on Halloween!  

Photobucket

The Tip Junkie  shared a whole handful of free halloween printables today!  That is where I found the RIP toppers on the Elle's Studio blog.  

Any questions let me know!  Enjoy~

Peace, Love & TRICKS for your TREATS~
Stacy

TRICKS for your TREATS

I'm so excited Halloween is almost here!  This week I will have sweet & easy TRICKS for your TREATS to share with you on my blog!

Here are some photos of what I will be sharing!


Like the printable signs you see in the 1st three photos? Click over to Gwynn Wasson Design Blog follow the instructions..... basically become a follower~ email her and she will send you the files!  How cool is that??  Thank you to one of my favorite event planners Courtney at Pizzazzerie for the tip to head over to Gwynn's blog to the freebies!   

Next post will be the easy but oh so scrumptious recipe for the "Graveyard Dirt" you see in the 3rd photo!  You won't want to miss the recipe, make sure you are a follower so you know when I post it tonight!

Peace, Love & Tricks for you Treats!

Stacy


Friday, October 22, 2010

{Updated} Ghostly S'mooooore's DIY Treats

Happy Friday!  Can you believe Halloween is next week?  There will be lots of Halloween & Harvest celebrations going on in the classrooms next week!  Here are 2 ideas for you to make and share with your son's/daughter's classroom or when they arrive home from trick or treating next Sunday!
halloween
First, last year in my daughter's 4th grade class I had the pleasure to read her class a book and hand out some special treats.  I picked up a short version of "The Legend of Sleepy Hollow"  this book is age appropriate and all 26 of them sat quiet and attentive, which had me nearly falling off of my stool while I was ready it.  Honestly, I was a little intimated to do this simply because I didn't want to bring in a book that was too young for them and certainly not one too old.  So if you are looking for a tween appropriate quick Halloween book this is defiantly one to pick up~

The Legend of Sleepy Hollow book by Washington Irving  on Amazon.com
These were the cinnamon shortbread cookies I made for them~

What's the plan for this year??  Ghostly Smooooore's treats with homemade marshmallow ghosts!
halloween
Do you want to make them and share them with your little ghoul's or their class?  Here's what you need~

Photobucket

Photobucket

~First you need to make the marshmallow.  Don't have a recipe for it?  This is the one I used from the Food Network Marshmallow recipe.  It was very simple, not as messy as I thought it would be or as I had read from other sites.  Basically if you've ever made rice krispy treats, you can make this and get it into your 13x9 pan without much of a problem.  Oh and I didn't use a candy thermometer either, just went by the time in boiling in the directions. 

~With the marshmallow you need a ghost cookie cutter, the one I have in the picture above is from Williams Sonoma

You also need:
~Graham crackers
~Snack size Hershey chocolate bars
~Plastic snack bags
~Halloween Printables.  The ones I used are from Bird Crafts and they are only $7 in her Etsy Shop!  Order ~them and she will email them to you with instructions and you print them yourself!
~Double sided tape
~Scissors, a scorer if you have one does make it easier to cut & a ruler
~Black icing or edible black marker for the eyes of the marshmallow ghost
~ Bakery Twine ( mine is The Twinery)

After the marshmallow is done, as per the directions cut out as many ghosts with your cookie cutter that you can,  the amount will depend on how big your cutter is.  Give him eyes and write "Boo" if you wish on him and let it dry.

For the treat bags~ 
In the mean time get your graham crackers & chocolate bars in the snack bags.  Also cut out your printables and put the double sided tape on the inside of the labels to stick to the top of the bags.  Like this~

Photobucket


I opened the bars for my bags so these favorite treats of many are ready to go with out much work for the ghouls & goblins other than opening their bags!

Here are my finished Ghostly S'mooooores~

Photobucket

Photobucket

For the "at home" S'Mooooore's~

Simply stack 2 graham crackers, 2 chocolate bars, top with your homemade marshmallow ghost and tie with your twine!  Hmmm a nice warm (if your in chilly fall weather) hot chocolate would go perfect with these treats after an evening a trick or treating.

A perfect ghostly treat for your ghoul's and goblins at anytime this next week!  Easy and with the homemade marshmallow you put a little extra DIY love in the scrumptious treat!  

Any questions or comments let me know!!  Thanks!

Peace, Love & Ghostly S'mooooore's,
Stacy
Wednesday, October 20, 2010

High Hopes October Baseball Cupcakes

I am a HUGE Phightin' Phillies Fan!  So I had to take time out of my day to prepare High Hope Cupcakes to watch the game tonight!


Spice Cupcakes with Cream Cheese Buttercream~


LET'S GO PHILS!!

Peace, Love & the Phightin' Phils,

Stacy

Monday, October 18, 2010

Happy National CHOCOLATE Cupcake Day!

Gotta love any day that celebrates sweet treats!  You have to especially love a day that honors the Chocolate Cupcake for sure! 

Whether your Chocolate Cupcake is Cute, Pretty or Classic like these~


A Chocolate Cupcake is a excellent treat especially with a scrumptious vanilla buttercream~


I am sharing the recipes for a Chocolate Cupcake with Vanilla Buttercream icing to top it!!  

My Basic Buttercream Recipe~

2 sticks of unsalted butter
1 tablespoon of vegetable shortening ( if you want to sub the shortening add ¼ stick of butter)
Cream butter and shortening or just the butter very well
Add 1 teaspoon of pure vanilla extract & a pinch of salt (I use Kosher)
Mix together

Adding the Sugar:
Total of 4 cups or 1 pound
Some recipes call for you to sift the sugar, I don’t find that necessary. What I do is~ pour the sugar into a mixing bowl 1st to loosen it up. 

Add the sugar to the butter 1 cup at a time on Medium Speed

After you are done it should be crumbly a bit and big chucks of sugar and butter~

Next the cream~

Add 2-3 tablespoons to start.  Again this is where buttercream becomes personal to me with the texture of it.  Mix again on medium until you get the desire of flavor and texture you want.  Only add 1 tablespoon additional at time to reach it. 

{TIP: if you add to much cream, just add more powder sugar.  But again a little at a time}

That is my basic buttercream!!   

It only takes about 12 mins to make and it so worth it!!  

If you would like to make a Peanut butter Buttercream click here to find my recipe! 


You can pick up a Chocolate ready mix at your grocery store or use this recipe from Joy of Baking she also has a little "did you know" about the history behind " cup cake".

Have fun & enjoy celebrating this fabulous day honoring THE Chocolate Cupcake!!  

Peace, Love & Chocolate Cupcakes,

Stacy

Any comments or questions leave them here or send me an email~ stacyk17@comcast.net

Tuesday, October 12, 2010

PB Buttercream Recipe & Stella and Dot inspired cake


Recently I was in a grocery line check out by myself (not normal) and I was checking out the candy display.  Usually I can’t even look at it because I have 3 girls and we try to avoid bringing any attention towards it, honestly I point to someone and tell the girls “it is that man’s over there please don’t touch” ;).  What can I say it works and I have already said “no” to about 20 other items in the store by that point this is easier for me, again it works and doesn’t cause a scene. 
Photo via Candy Warehouse


Anyway, I notice that there are dark chocolate Reese’s cups which had me create this cupcake for a Stella & Dot party I did this weekend! 

Here are the photo’s of the cupcakes and cake!!  Everyone loved them and I got so many compliments on how everything tasted and looked ;) because it is all about the “Taste & Presentation” with me ;)

Peanut Butter buttercream & dark chocolate cupcake


mocha espresso buttercream on white butter cupcake


Oreo cookie buttercream on a white butter cupcake
Cake I did was inspired by the Jenna & Natashia Necklaces~ they are both so pretty! Here is Tracey's website who was the S&D stylist for this party.


Now for the recipe for the Peanut Butter Buttercream~ a simple & scrumptious recipe for the peanut butter buttercream which I know you will absolutely love!

What you need for the buttercream~

1 stick or 8 tablespoons of unsalted butter
2-3 heaping tablespoons of peanut butter 
 (I use Smuckers Natural PB ~ Creamy style. It is one of the best PB out there nothing added just peanuts & a little bit of salt)
1 teaspoon of vanilla
1 box of confectioner’s sugar or 4 cups
3-4 table spoons of heavy cream

Here what you do~ seriously you need to make this and it is so quick maybe 10 to 15 minutes total time to make it!
 
Cream with your mixer the butter & peanut butter until well blended and creamy
Mix in your vanilla

Add your sugar one cup at a time total of 4 it should look something like this~


Then add your cream 3 tablespoons at first beat well at least 3-4 minutes.  If during the time the buttercream isn’t coming together well add another tablespoon of cream.  If you add too much cream and it becomes to thin just add a little more sugar. 


There really is no reason to buy store bought buttercream~ I am sharing this simple & easy recipe with you so you can make your own scrumptious treat!!

Make sense?  Any questions leave a comment or send me an email!  Would love to hear from you!

Enjoy your day!

Peace, Love & Peanut Butter,

Stacy